
 Our products
 Aromatherapy - essential oils
 Essential oils
 Aroma lamps
 Aroma Diffusers
 Seeds
 Vegetables
 Herbs and spices
 Ornamental Plant Seeds
 Grass mixtures
 Sprouts and microgreens
 Growing supplies
 Cultivation and Gardening Supplies
 Hydroponics and indoor growing
 Protective equipment and gardening tools
 Exotic plants
 Exotic Fruit and Vegetables
 Exotic herbs
 Exotic trees and shrubs
 Ornamental exotic plants
 Roasted coffee
 Espresso coffee
 Ecological coffee preparation
 Thermal mugs and coffee cups
 Aeropress
 Thermos flasks and thermal mugs for coffee and tea
 Moka pot
 Filter coffee
 Coffee blends
 Accessories for coffee makers
 Water filtration
 Coffee grinders
 Cleaning the Coffee Maker
 Ecological Cleaning of Coffee Machines
 Coffee makers
 Coffee Preparation
 Coffee Accessories
 Food products
 For wildlife and pets
 Chocolate and others
 Hemp food products
 Natural cosmetics
 Hemp cosmetics
 Smoking supplies
 Bongs - water pipes
 Blunts and tubes
 E-liquids with Terpenes and CBD
 Grinders and Mills
 Papers and filters
 Smoking accessories
 Vaporizers
 Air fresheners
 CBD and CBG products
 CBD sprays
 CBD and CBN crystals
 CBD body and facial care
 Weeds
 CBD suppositories and capsules
 CBD oils and drops
 CBG oils and drops
 House and garden
 Fashion and Decoration
 Kitchen essentials and cooking
 Christmas Decorations and Accessories
 Gift Sets
 Bird feeders
 Seasonal and Special Tools
In short: Most seeds germinate at 20-25 °C in evenly moist, airy substrate, sown at a depth of 2 to 3 times the seed diameter. Seeds under 1 mm belong on the surface because they need light. Hard-coated species need soaking (12-24 hours) or scarification, and perennials such as lavender need 30-90 days of cold stratification.
| Optimal temperature (most species) | 20-25 °C; heat-loving 25-30 °C, cold-loving 10-15 °C |
|---|---|
| Sowing depth | 2-3x the seed diameter; seeds under 1 mm on the surface |
| Soaking | 12-24 hours in water at 20-25 °C |
| Cold stratification | 1-5 °C for 30-90 days (refrigerator, never freezer) |
| Viability test | 10 seeds on damp paper towel, count after 7-14 days; under 40 % germination means buy new seed |
| Seed storage | 1-10 °C, below 8 % humidity, airtight container with silica gel |
Germination is the moment when life emerges from a seemingly lifeless seed. It is one of the most critical moments in the entire life cycle of a plant – and at the same time a phase in which beginning growers make the most mistakes. Too wet, too dry, wrong sowing depth, unsuitable temperature – a single mistake can turn even quality seed into disappointment.
In this guide, we will go through everything from seed anatomy to advanced techniques such as stratification and scarification. You will learn which method to choose for specific plant types, how to test the viability of older seeds, and how to store them correctly to maintain their germination capacity as long as possible.
1. Seed Anatomy – What Hides Inside
Understanding seed structure helps explain why individual germination techniques work and when they are necessary.
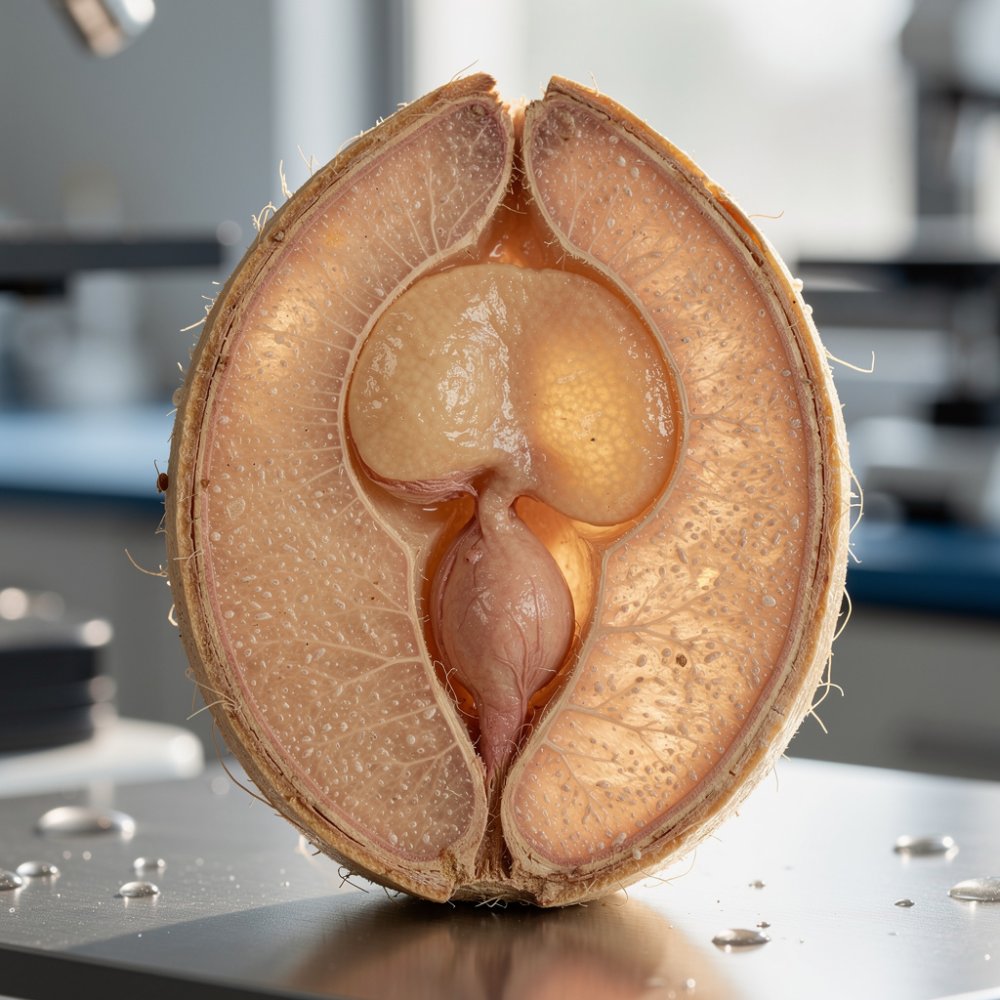
Each seed consists of three basic parts:
- Seed coat (testa) – outer protective shell. In some species it is thin and soft (tomatoes, lettuce), in others hard almost like a shell (beans, lupine). It is precisely the character of the seed coat that determines whether scarification will be needed.
- Endosperm – storage tissue full of starches, fats and proteins, which provides energy to the embryo until the seedling creates its own leaves and functional root system.
- Embryo (germ) – miniature plant with a primary root (radicle), stem (hypocotyl) and seed leaves (cotyledons).
During germination, water penetrates the seed coat and activates enzymes in the endosperm. These begin to break down storage substances into simple sugars and the embryo awakens to life. The root emerges first, followed by the stem with the seed leaves. The entire process is triggered and maintained by a combination of moisture, temperature and oxygen.
2. Conditions for Successful Germination
Every seed needs four basic factors to germinate. Their optimal values differ depending on the species, but the principles are universal.
Moisture
Water is the trigger for the entire process – the seed must absorb a sufficient amount of water to activate enzymes. The substrate must be evenly moist, not wet. Oversaturation with water prevents oxygen access and leads to root rot even before their full development.
Practical rule: Squeeze a handful of substrate in your palm. At most a few drops should drip from it. If a stream of water flows, the substrate is too wet.
Temperature
Most garden plants germinate optimally at 20-25 °C. Some species require significantly different conditions:
| Plant group | Optimal germination temperature | Examples |
|---|---|---|
| Cold-loving | 10-15 °C | Lettuce, spinach, peas |
| Standard | 20-25 °C | Tomatoes, peppers, cucumbers, herbs |
| Heat-loving | 25-30 °C | Basil, melons, chilli |
| Requiring cold (stratification) | 1-5 °C for 30-90 days | Lavender, echinacea, strawberries |
Tip: Heating mats and propagators with adjustable temperature are the most reliable way to maintain constant germination conditions. Window sill temperature can fluctuate by 10-15 °C in a single day.
Oxygen
Seeds need oxygen for the metabolic processes of germination – overwatering is therefore fatal as water displaces air from the substrate's pores. Choose airy sowing substrates and always seed trays with functional drainage.
Light
Most seeds germinate in darkness and do not need light to germinate. The exception is very fine seeds that naturally do not become buried in soil:
- Need light: lettuce, petunias, poppies, cress, lemon balm, fine herb seeds.
- Tolerate or require darkness: most larger seeds – beans, peas, sunflowers, cucumbers.
Practical rule: If a seed is smaller than 1 mm, it probably needs light to germinate – sow it on the substrate surface without covering.
3. Overview of Germination Techniques
Method 1: Paper Towel Method
The most widespread technique among growers due to its simplicity and the ability to monitor germination continuously without any substrate needed.
Procedure:
1. Dampen the paper towel with clean water – it should be moist, not wet.
2. Lay seeds on one half of the towel with spacing of at least 2 cm.
3. Fold the other half over the seeds.
4. Place in a resealable bag or on a plate covered with foil.
5. Place in a warm and dark place (20-25 °C).
6. Check daily and maintain moisture.
7. Once the root reaches 1-2 cm in length, carefully transplant into substrate.
Advantages: Visual monitoring of germination, speed (2-5 days), minimal costs.
Disadvantages: Risk of damaging the delicate root during transplanting, daily monitoring required.
Suitable for: Tomatoes, peppers, cucumbers, melons, herbs, testing viability of older seeds.
Method 2: Jiffy Pellets (Peat Pellets)
Compact peat pellets that swell when soaked into a roller with ideal structure for germination – airy yet sufficiently moist.
Procedure:
1. Place jiffy pellets in a bowl and pour warm water (approx. 25 °C).
2. Wait 5-10 minutes for pellets to fully swell.
3. Gently squeeze out excess water.
4. Place 1-2 seeds in the hole in the center of the pellet.
5. Lightly cover with peat from the edge of the pellet.
6. Place in a propagator or cover with foil.
7. Maintain temperature of 20-25 °C and ventilate regularly.
Advantages: No transplant shock – seedlings are transplanted with the pellet, optimal substrate airiness, simple handling.
Disadvantages: Higher acquisition costs for the pellet, with some manufacturers gradually declining pH.
Suitable for: All species, especially plants with delicate roots (basil, chilli, cucumbers).
Method 3: Direct Sowing into Substrate
Traditional method where seeds are sown directly into sowing or final substrate without a preparatory stage.
Procedure:
1. Fill seed trays with light sowing substrate.
2. Thoroughly moisten the substrate and let excess water drain.
3. Create a hole with depth corresponding to 2-3 times the seed's diameter.
4. Insert the seed and lightly cover with substrate.
5. Spray the surface gently with a mister – never with a direct stream of water.
6. Cover with a propagator lid or foil.
Sowing depth by seed size:
| Seed size | Sowing depth | Examples |
|---|---|---|
| Very fine (< 1 mm) | On surface, do not cover | Lettuce, petunias, cress |
| Fine (1-3 mm) | 3-5 mm | Tomatoes, peppers, basil |
| Medium (3-10 mm) | 1-2 cm | Cucumbers, melons, courgettes |
| Large (> 10 mm) | 2-5 cm | Beans, peas, maize |
Advantages: No transplanting, natural germination environment.
Disadvantages: No visual control of progress, higher substrate consumption.
Suitable for: Large seeds (beans, peas), root vegetables, direct sowing in the garden.
Method 4: Seed Soaking
Pre-soaking in warm water softens the seed coat and speeds up germination in species with tougher shells.
Procedure:
1. Immerse seeds in lukewarm water (20-25 °C).
2. Soak for 12-24 hours – do not exceed this time as there is a risk of oxygen deprivation and damage to the embryo.
3. Seeds that sink to the bottom are typically viable. Seeds floating on the surface may be empty or damaged.
4. After soaking, immediately sow into substrate or transfer to a paper towel.
Suitable for: Beans, peas, maize, sunflowers, parsley and other species with firmer seed coats.
Method 5: Scarification (Mechanical Damage to Seed Coat)
Some seeds have a seed coat so hard that water cannot penetrate it without mechanical or thermal intervention. In nature, this function is performed by passage through animal digestive tracts, frost, or the abrasive action of soil.
Scarification techniques:
- Sandpaper: Gently rub the surface of the seed with sandpaper (grit 120-220). The aim is to damage the shiny outer layer, not to sand through the seed coat to the embryo.
- File: Suitable for larger seeds – make a small surface notch in the seed coat.
- Hot water: Pour seeds with water at 70-80 °C and let slowly cool in the container for 12-24 hours.
- Pliers or secateurs: For very hard seeds (lupine, dahlias) carefully break the tip without injuring the embryo.
Suitable for: Lupine, sweet pea, hibiscus, dahlias, some tropical species and any seeds with noticeably glossy and hard surface.
Method 6: Stratification (Simulating Winter Cold)
Many perennial and woody species have a built-in physiological mechanism that requires a cold period before germination. In nature, this corresponds to overwintering in the soil. Without undergoing stratification, these seeds simply will not germinate, regardless of sowing quality.
Cold stratification procedure:
1. Mix seeds with lightly moist sand, vermiculite or peat.
2. Place the mixture in a resealable bag or container.
3. Place in the refrigerator (1-5 °C) – never in the freezer.
4. Duration of stratification varies by species (see table below).
5. After the required time has elapsed, sow normally at room temperature.
Stratification duration by species:
| Species | Duration of stratification | Notes |
|---|---|---|
| Lavender | 30-40 days | Cold stratification |
| Echinacea | 30-60 days | Cold stratification |
| Strawberries | 30 days | Cold, then germination in light |
| Juniper | 90-120 days | Cold stratification |
| Sage | 14-21 days | Short cold period |
| Hepatica | 30 days | Cold stratification |
| Angelica | 60-90 days | Cold stratification |
Warm stratification: Some species – especially trees with hard seeds like viburnum or dogwood – require first a period of warmth (20-25 °C for 60-90 days) and only then a cold cycle. This is a two-stage process mimicking passage through both summer and winter.
4. Sowing Equipment – What You Really Need
Proper equipment can significantly improve germination success. You don't need to invest in everything at once, but basic tools quickly pay for themselves.
Seed Trays and Seed Starters
Seed trays and seed starters form the foundation of every sowing. They come in various configurations for different needs:
- Single-chamber seed trays – ideal for bulk sowing of a single species, sprouts or microgreens.
- Cell starters – each seed has its own cell, seedling roots do not intertwine and transplanting occurs without damage.
- Plug trays – professional solution for large numbers of seedlings at once.
Propagators
Propagators maintain constant humidity and temperature – the two most important germination factors. A quality propagator with adjustable ventilation holes and bottom heating is the best investment for any grower who sows regularly.
What to focus on when choosing:
- Clear lid that transmits light to seedlings.
- Adjustable ventilation holes as prevention of excessive humidity and fungus.
- Bottom plate heating, ideally with thermostat.
- Sufficient lid height for the first centimeters of growth.
Seed Tapes and Plastic Cloches
Seed tapes are a practical solution for direct sowing in the garden – preset spacing eliminates the need to thin out oversown seedlings. Plastic cloches serve as simple and affordable alternatives to propagators for smaller sowings.
Seedlings and Pre-grown Plants
If you don't want to start from seed, in the seedlings category you will find pre-grown saplings, bulbs and tubers ready for direct planting. Suitable for beginners or late season starting.
Sprouts and Microgreens
A special category are sprouts and microgreens – here the goal is consuming germinating seeds, not growing an adult plant. They require a different approach: frequent rinsing, no substrate and harvest already 5-14 days after sowing.
5. Seed Viability Test (Germination Test)
Do you have older seeds and are unsure whether they still germinate? Perform a simple home test before sowing an entire container.
Procedure:
1. Take a sample of 10 seeds from the stock.
2. Lay them on a damp paper towel.
3. Wrap in a bag and place in warmth (20-25 °C).
4. After the standard germination time for the given species (7-14 days) has elapsed, count how many seeds germinated.
5. Express the result as a percentage of germination.
Result interpretation:
| Germination | Rating | Recommendation |
|---|---|---|
| 80-100 % | Excellent | Sow normally |
| 60-80 % | Good | Sow denser (approximately 1.5 times) |
| 40-60 % | Weak | Place 2-3 seeds per position |
| Below 40 % | Low | Consider purchasing new seeds |
Water test (quick orientation screening): Immerse seeds in a glass of water. Seeds that sink to the bottom within 30 minutes are typically viable. Seeds floating on the surface may be empty or have depleted storage substances. This test is not 100% reliable but provides quick initial orientation.
6. Seed Storage – How to Maintain Viability for Years
Proper storage can extend seed life by several years. Unsuitable conditions, on the other hand, can render them worthless in a single season.
Main Seed Enemies
- Moisture – triggers premature germination or fungal development.
- Heat – accelerates degradation of storage substances in the endosperm.
- Light – can disrupt dormancy in some species.
- Oxygen – causes oxidation of fats stored in the embryo.
Ideal Storage Conditions
- Temperature: 1-10 °C (refrigerator is ideal for home growers).
- Humidity: Below 8% relative humidity – add a packet of silica gel to the container.
- Container: Airtight glass jar or zip-lock bag.
- Label: Species, variety and date of collection or purchase.
How Long Do Seeds Last?
| Species | Approximate lifespan | Conditions |
|---|---|---|
| Tomatoes | 4-7 years | Dry, cool |
| Peppers | 2-4 years | Dry, cool |
| Cucumbers, melons | 5-10 years | Dry, cool |
| Lettuce | 3-5 years | Dry, cool |
| Beans, peas | 3-4 years | Dry, cool |
| Carrot, parsley | 1-3 years | Shorter lifespan |
| Onion, leek | 1-2 years | Shortest lifespan |
| Herbs (basil, dill) | 2-5 years | Varies by species |
7. Troubleshooting Germination Problems
Seeds Do Not Germinate
Possible causes and solutions:
- Too low temperature – use a heated propagator.
- Oversaturated substrate – moisture should be even, not stagnant.
- Too deep sowing – follow the 2-3 times seed diameter rule.
- Old or poorly stored seeds – first perform a germination test.
- Missing stratification – verify whether the species requires cold.
- Hard seed coat – try scarification or pre-soaking.
Seedlings Damping Off
Fungi of the Pythium and Rhizoctonia genera cause seedling collapse at the stem base just above the substrate. Prevention is easier than cure:
- Use sterile substrate and thoroughly cleaned containers.
- Ensure regular ventilation of the propagator.
- Do not over-water – let the substrate dry slightly between waterings.
- Sprinkle the substrate surface with a thin layer of vermiculite, which dries quickly.
Seedling Stretching (Etiolation)
Tall, thin and pale seedlings are a clear signal of insufficient light:
- Move seed containers as close as possible to the light source or under a grow lamp.
- Slightly reduce temperature – seedlings will grow more slowly but more compactly.
- Add substrate to the stem so the seedling is better supported.
Uneven Germination
Seeds germinate over a period of several days to weeks – this can have multiple causes:
- Natural variability – seeds in the same package are never completely identical.
- Uneven moisture in substrate – some parts of the tray are drier.
- Temperature gradient in the container – tray edges are typically cooler than the center.
8. Germination by Plant Type – Practical Examples
Tomatoes and Peppers
- Method: Paper towel or jiffy pellets.
- Temperature: 22-28 °C; peppers prefer the upper end of the range.
- Germination time: Tomatoes 5-10 days, peppers 7-21 days.
- Sowing depth: 5-10 mm.
- Tips: Peppers are naturally slow – at 20 °C they easily germinate in three weeks. Higher germination temperature significantly speeds things up.
Cucumbers and Melons
- Method: Direct sowing into jiffy pellets or larger starters.
- Temperature: 25-30 °C.
- Germination time: 3-7 days.
- Sowing depth: 1-2 cm.
- Tips: These species tolerate transplanting poorly – choose biodegradable containers or jiffy pellets. Soaking seeds for 12 hours noticeably speeds up germination.
Herbs
- Method: Surface sowing on damp substrate, covered with propagator.
- Temperature: 18-22 °C for most species, 25 °C for basil.
- Germination time: 7-21 days – herbs are generally slower than vegetables.
- Sowing depth: On surface or maximum 2-3 mm.
- Tips: Basil requires both warmth and light simultaneously. Parsley is notoriously slow (14-28 days) – soaking seeds for 24 hours notably shortens germination.
Chilli Peppers
- Method: Paper towel in a heated propagator.
- Temperature: 25-32 °C; higher germination temperature speeds up the entire process.
- Germination time: 7-30 days, superhot varieties even considerably longer.
- Sowing depth: 5 mm.
- Tips: Carolina Reaper and similar superhot varieties can germinate for 6 weeks or more. Constant warmth and patience are absolutely essential with these species.
Annual Flowers
- Method: Direct sowing into starters.
- Temperature: 18-22 °C.
- Germination time: 5-14 days.
- Tips: Sow fine petunia, lobelia or pansy seeds on the surface without covering – they need light to germinate.
Perennial Flowers (Requiring Stratification)
- Method: Cold stratification in refrigerator, then sowing into substrate.
- Temperature: 1-5 °C during stratification, then 18-22 °C for germination.
- Total time: 30-90 days stratification + 7-21 days germination.
- Tips: Plan ahead – for spring sowing start stratification in January.
Frequently Asked Questions (FAQ)
Do I Need to Soak Seeds Before Sowing?
Not always. Soaking brings demonstrable benefits for species with firmer seed coats – beans, peas, parsley, sunflowers. For fine seeds (tomatoes, lettuce) soaking is unnecessary and complicates handling.
How Deep Should I Sow a Seed?
General rule: sowing depth corresponds to 2-3 times the seed's diameter. Very fine seeds (under 1 mm) are placed on the surface and only lightly pressed. Excessively deep sowing is one of the most common beginner mistakes – the embryo simply doesn't have enough energy to push through to the surface.
Do Seeds Need Light to Germinate?
Most seeds germinate in darkness. Light is needed only for species with very fine seeds – lettuce, petunias, poppies, cress. After germination, however, all seedlings need intensive light as soon as possible after emergence.
How Long Does Germination Take?
It depends on the species and conditions. Tomatoes germinate in 5-10 days, peppers in 7-21 days, basil in 5-14 days, parsley in 14-28 days, superhot chilli varieties for 6 weeks or more. Proper germination temperature significantly shortens the time.
Can I Use Tap Water?
In most cases yes. If your water has elevated chlorine content, let it stand in an open container for 24 hours. Filtered water or water with pH in the neutral range is ideal.